

 Portuguese
 English
 Hungarian
 Indonesian
 Bulgarian
 Turkish
 Polish
 Russian
 Spanish
 Korean
 French


Um pequeno erro de instalação pode paralisar toda a sua fábrica de tecidos. A configuração adequada dos equipamentos é absolutamente fundamental. Uma preparação inadequada do local gera paradas onerosas. É preciso dominar hoje todo o processo de instalação, do início ao fim. Neste artigo, você aprenderá como instalar máquinas têxteis: da preparação do local até a comissionamento.
Phase 1: Crucial Textile Machinery Site Preparation
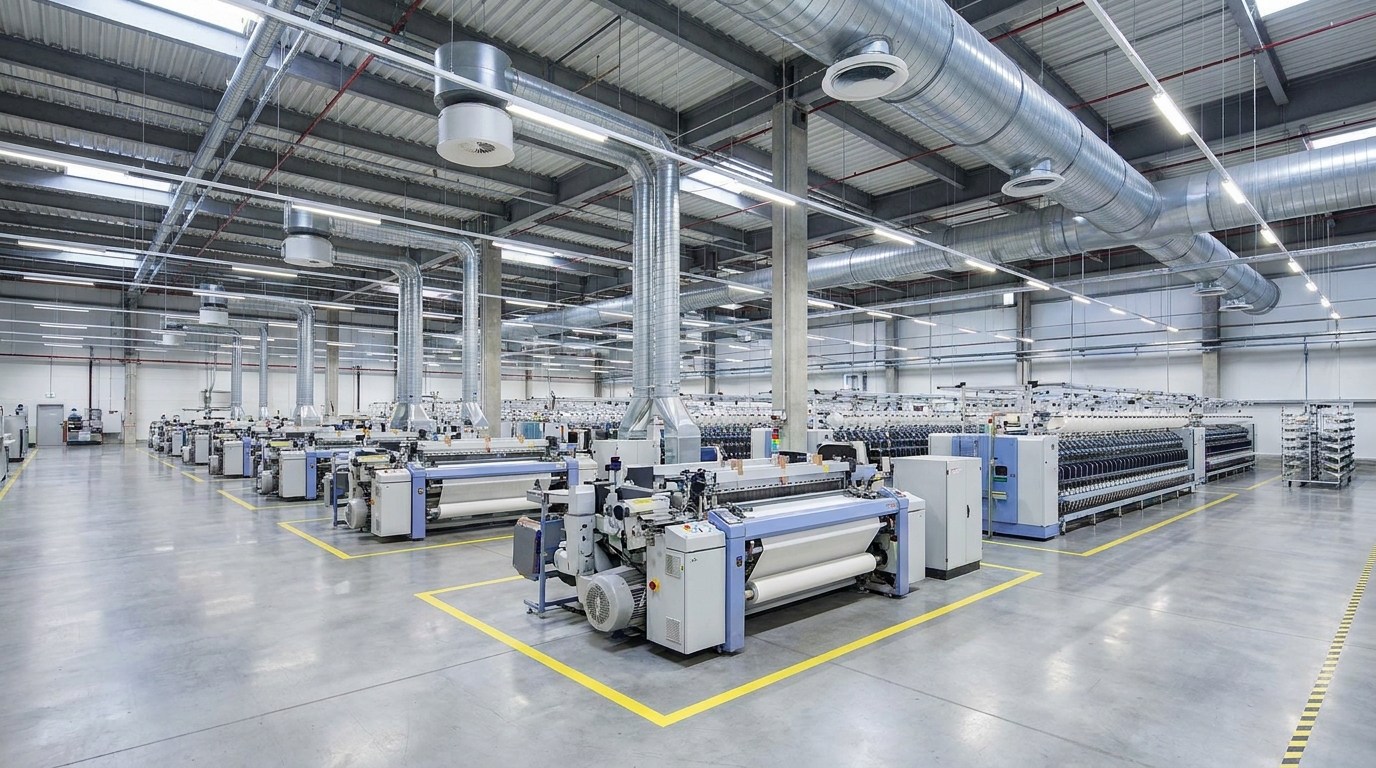
Getting your layout right is the very first step. Poor initial planning will quickly halt your entire project. Before uncrating anything, you must assess your factory floor. Workflow efficiency dictates exactly where each unit sits.
Long continuous lines demand careful spatial planning. For example, installing drying machines requires extensive linear space. At SutexMach, we have over 30 years of industry experience. We build intelligent textile machines for global fabric mills. We know you cannot bend a long stenter frame into a tight corner.
Next, map out your clearance zones carefully. Do not cram your new equipment together. You need a minimum 1-meter walkway around the entire machine. This dedicated space allows your operators to work safely. It gives maintenance teams room to access critical panels and handle material carts.
Environmental and Safety Controls
Modern equipment relies heavily on sensitive electronics. You must control the environment before any machines arrive. Intelligent PLC units often fail in extreme heat. Keep your facility temperature strictly between 20°C and 25°C.
You also need to maintain 50% to 65% Relative Humidity. This specific moisture level prevents dangerous static buildup. It also stops yarn breakage during high-speed production. Install your humidification and ventilation systems early in the process.
| Site Prep Category | Requirement / Metric | Primary Purpose |
|---|---|---|
| Clearance Zones | Minimum 1-meter walkway | Operator safety and maintenance access |
| Temperatura | 20°C – 25°C (68°F – 77°F) | Protect intelligent electronic components |
| Humidity | 50% – 65% RH | Prevent yarn breakage and static |
Finally, lock down your facility safety protocols. Clear all pathways from the main loading dock. Heavy crates require heavy forklifts and overhead cranes. Secure the perimeter to keep unauthorized staff out.
Keep exits clear during the instalação de máquinas têxteis process. Solid preparação do local para máquinas têxteis prevents accidents entirely. You can keep your timeline intact and move to the next phase smoothly.
Phase 2: Understanding Textile Machine Foundation Requirements
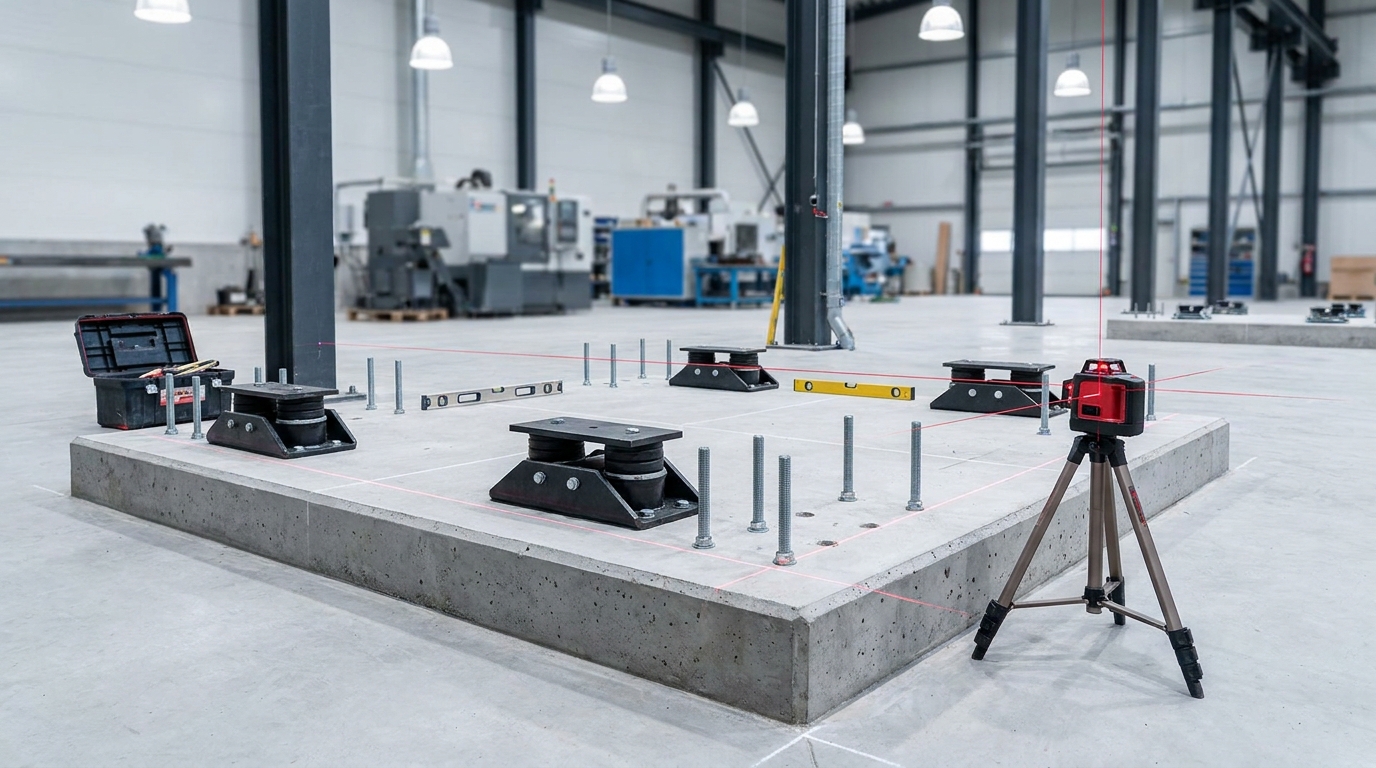
You secured your pathways and controlled your climate in phase one. Now, you must focus on the ground beneath your equipment. Understanding textile machine foundation requirements prevents catastrophic structural failures later.
Heavy-duty intelligent textile machinery demands specialized, reinforced bases. You cannot simply drop a massive calendering machine onto a standard factory floor. The concrete will crack under the immense weight and constant dynamic loads.
Soil Bearing Capacity and Slab Thickness
Industrial textile machines exert massive downward pressure. Your floor must support 500 to 1,500 kg/m². This capacity depends entirely on the specific machine weight and its operating vibration frequency.
We recommend pouring reinforced concrete floors measuring 150mm to 300mm thick. Standard concrete is rarely strong enough for this job. You usually need high-strength, non-shrink grout to anchor the base plates properly.
At SutexMach, we build heavy drying, stenter, and warp knitting machines. We know weak soil bearing capacity causes machinery to sink or tilt over time. Even a slight tilt ruins fabric tension and destroys production quality.
Before you ever reach the lista de verificação de comissionamento de máquina têxtil, you must respect the curing process. New concrete foundations must cure for at least 28 days. You must wait out this entire period before placing any heavy machinery or drilling anchor holes.
Vibration Isolation and Precision Leveling
High-speed fabric processing generates intense vibrations. You must isolate this kinetic energy to protect your factory floor and neighboring equipment. Anti-vibration mounts (AVM) and leveling pads are absolutely mandatory here. They absorb the shock and stop the machine from walking across the floor.
Precision leveling is critical for intelligent textile machinery. Standard leveling tolerance sits tightly between 0.05mm and 0.1mm per meter.
| Foundation Component | Technical Specification | Primary Function |
|---|---|---|
| Floor Load Capacity | 500 – 1,500 kg/m² | Supports static weight and dynamic operational loads |
| Concrete Thickness | 150mm – 300mm | Prevents structural cracking under heavy machinery |
| Leveling Tolerance | 0.05mm – 0.1mm per meter | Ensures precise fabric tension and needle timing |
| Curing Time | Minimum 28 days | Maximizes concrete strength before anchoring |
If you install long continuous lines, cumulative errors build up fast. You should use a laser tracker or theodolite for machines exceeding 10 meters in length. Traditional spirit levels are simply insufficient for long-range alignment.
Finally, choose your anchoring method wisely. We highly recommend chemical anchors over mechanical ones. Chemical anchors handle high-vibration textile machines much better. They secure the heavy frame firmly without exerting outward expansion stress on your new concrete base.
Phase 3: Unloading, Unpacking, and Positioning

You poured the reinforced concrete. You waited out the 28-day curing period. You selected your chemical anchors. Now, the actual equipment arrives at your facility.
Moving heavy industrial machinery from a flatbed truck to its final spot requires extreme precision. One wrong move during unloading can warp a massive frame instantly. Learning how to install textile machinery properly means mastering this critical logistical phase.
Coordinating Logistics and Heavy Rigging
Heavy rigging equipment is mandatory here. You cannot rely on standard warehouse forklifts to move multi-ton drying machines. They will tip over or drop the load entirely.
Coordinate with professional riggers early. Hire specialized cranes capable of handling awkward, unbalanced loads safely. Your textile plant layout dictates the exact movement path. Ensure overhead cranes have enough clearance to navigate the factory floor. They must avoid the new humidification piping you installed during site prep.
Before moving anything inside, stop and check your inventory. Cross-reference every single crate against the master packing list. Missing parts will completely stall your installation timeline later. Document every delivered component immediately upon arrival.
Safe Unpacking Procedures
Uncrating sequences matter immensely. Never pry wooden crates open aggressively. You might strike a delicate electronic sensor or an exposed HMI panel.
Intelligent textile machinery contains highly sensitive parts. At SutexMach, we manufacture precision warp knitting and sueding machines. We know a single careless crowbar strike can destroy delicate warp knitting needles. It can deeply scratch precision sueding rollers and ruin fabric quality.
Remove protective films and anti-rust coatings carefully. Only remove them when you are ready to assemble that specific section. Leaving bare metal exposed early invites flash rust. This is especially true in the 50% to 65% humidity environment you just created.
| Unpacking Focus Area | Handling Rule | Risk Avoided |
|---|---|---|
| Electronic Panels | Use manual hand tools only | Prevents shock damage to PLCs and inverters |
| Precision Rollers | Keep factory wrapping intact until assembly | Avoids deep scratches on sueding or calendering rolls |
| Small Components | Inventory immediately against packing list | Prevents lost foundation bolts, sensors, or needles |
Positioning Without Frame Distortion
Moving the machinery to its final designated spot is incredibly risky. Long-frame units bend easily if lifted incorrectly. Stenter frames and long drying machines are particularly vulnerable to structural twisting.
Always use the designated lifting lugs specified by the manufacturer. Never sling chains around main drive shafts. Do not wrap straps around aluminum guide rollers. These parts cannot support the massive machine weight.
Keep the load perfectly balanced during transit. Uneven lifting stresses the welded joints. It compromises the structural integrity of the entire frame before you even begin leveling. Gently lower the machine over your marked foundation lines. You are now ready to align the base plates.
Phase 4: The Core Textile Machinery Installation Process
You gently lowered the equipment over your marked foundation lines. Now, the actual mechanical assembly begins. The core textile machinery installation process transforms a collection of heavy crates into a unified production line. This phase requires absolute patience and strict attention to detail.
Assembling Modular Components
Large industrial setups rarely arrive in one piece. You must connect multiple modular sections sequentially. This is especially true for massive calendering machines and continuous drying lines.
At SutexMach, we design our intelligent stenter and calendering machines modularly. This makes global shipping much easier. However, you must bolt these individual sections together perfectly on site. A tiny misalignment between two modules multiplies down the line. It causes severe mechanical binding later. Always tighten modular joints evenly using calibrated torque wrenches.
Precision Leveling and Alignment
We discussed the importance of laser trackers for machines over 10 meters earlier. Now you must put them to actual use. Traditional spirit levels fail over long distances. They allow cumulative errors to build up completely unnoticed.
You need industrial laser tools to hit that strict 0.05mm to 0.1mm per meter tolerance. If a warp knitting unit is slightly off-level, fabric skewing happens immediately. Uneven tension quickly destroys delicate yarns during production. Adjust your leveling pads very slowly. Double-check every single measurement before moving to the next base plate.
| Installation Step | Tool / Material Used | Critical Outcome |
|---|---|---|
| Modular Assembly | Calibrated torque wrenches | Prevents structural frame distortion |
| Precision Leveling | Industrial laser tracker | Stops fabric skewing and tension loss |
| Machine Anchoring | Non-shrink grout | Eliminates vibration walking permanently |
| Auxiliary Setup | Heavy-duty guardrails | Ensures strict operator safety compliance |
Securing the Machine to the Foundation
Once you achieve perfect alignment, lock the frame down. We covered the benefits of chemical anchors previously. They handle high-vibration equipment incredibly well.
Insert your foundation bolts into the prepared floor holes. Next, pour high-strength, non-shrink grout around them. This specialized grout fills every tiny void. It bonds the heavy machine base directly to your cured concrete slab. You must let this grout cure completely. Never tighten the final anchor nuts while the grout is still wet.
Installing Auxiliary Equipment
The main structural frame is now secure. Next, you must install the vital auxiliary systems. Connect your exhaust ducts directly to the drying units and stenters. Proper ventilation actively removes excess heat and dangerous chemical fumes from your facility.
Finally, bolt down all safety guardrails around the perimeter. OSHA and ISO compliance strictly requires these physical barriers. They protect your operators from exposed drive shafts and hot surfaces. You also need to mount external material handling creels and fabric take-up units during this step.
Phase 5: Utility Connections and System Integration
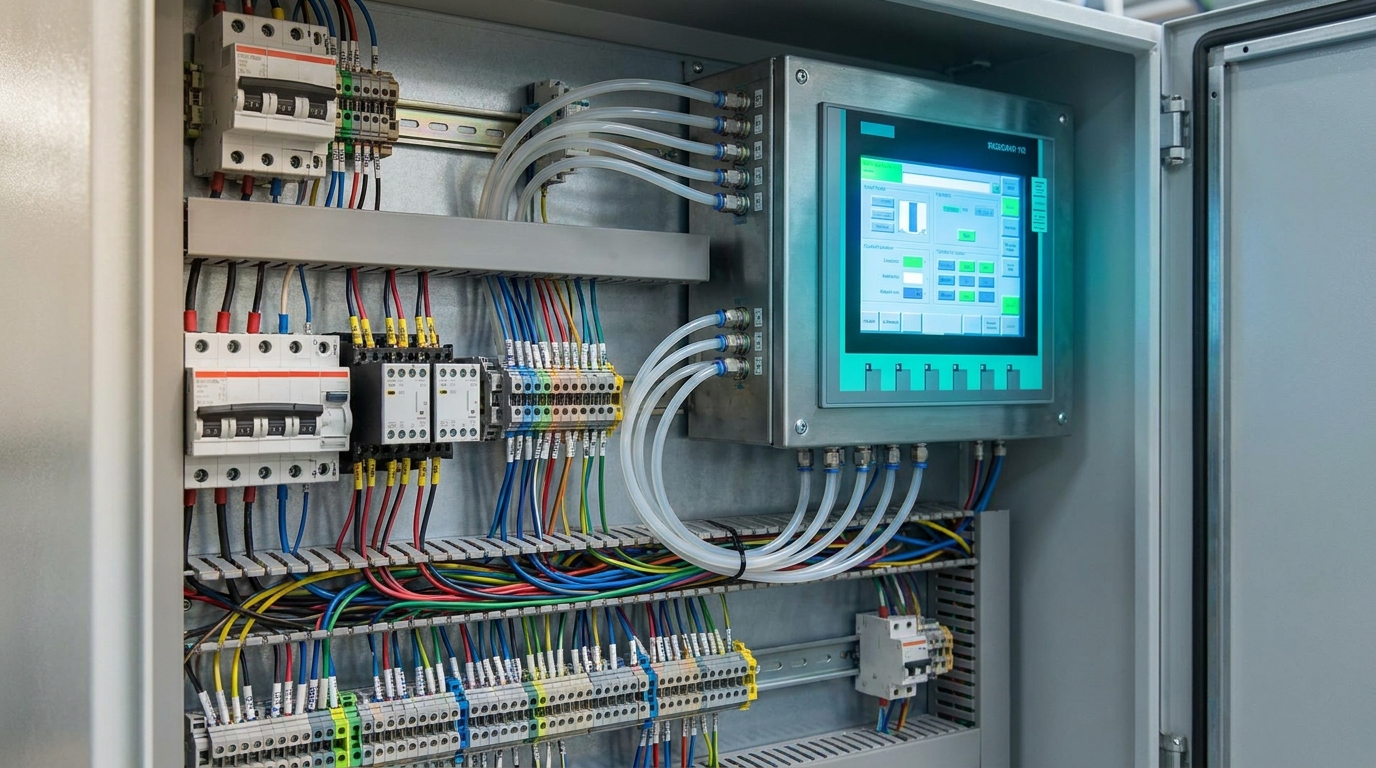
You secured the main structural frame. You let the non-shrink grout cure completely. You bolted down all safety guardrails. Now, you must bring the equipment to life. The utility connections and system integration phase powers up your entire production line. Without precise utility management, perfectly leveled machines will still fail.
Electrical Wiring and Grounding
Electrical wiring demands strict attention. You must match voltage and frequency exactly. Voltage fluctuations must stay within ±5% to ±10%. Unstable local grids cause frequent tripping. They destroy sensitive inverter drives quickly.
Modern intelligent textile machinery relies heavily on stable power. You need dedicated grounding. Keep the earthing resistance strictly under 1 Ohm. This protects your PLC-controlled units from dangerous electrical noise.
Always check the phase rotation before powering up any motors. Incorrect phase rotation makes motors run in reverse. It causes severe mechanical damage instantly. Verify every single connection against the manufacturer wiring diagram.
Plumbing and Water Supply
Next, you must set up robust plumbing networks. High-capacity water lines feed directly into the processing chambers. Ensure all piping joints remain completely leak-proof. Sudden pressure drops ruin fabric batches fast.
At SutexMach, we manufacture advanced dyeing and dewatering machines. We know consistent water flow is absolutely critical here. You cannot compromise on plumbing quality. Install high-quality industrial valves to regulate water intake precisely. Flush the entire plumbing system before connecting it to the machine. This removes construction debris from the pipes.
Pneumatic and Steam Connections
Your pneumatic systems require clean, compressed air. Standard pneumatic requirements range from 6 to 8 bar (87–116 PSI). You must filter this air down to 0.01 micron. It must remain completely oil-free and dry.
Moisture in the air lines destroys internal pneumatic cylinders. It corrodes delicate control valves over time. Connect your steam lines carefully next. Our SutexMach air-softening and drying machines rely on consistent steam pressure. Proper steam flow ensures uniform heat distribution across the moving fabric.
| Utility Category | Technical Requirement | Primary Function |
|---|---|---|
| Electrical Power | ±5% to ±10% voltage fluctuation | Protects sensitive inverter drives from burnout |
| System Grounding | Resistance < 1 Ohm | Shields PLC units from electrical noise |
| Compressed Air | 6 to 8 bar, 0.01-micron filtration | Powers internal pneumatic cylinders safely |
| Steam and Water | Consistent pressure routing | Ensures uniform dyeing and drying processes |
Integrating Intelligent Control Systems
The final step involves the digital brain. You must integrate the intelligent control systems. Connect all sensor wires back to the main PLC panels. Secure these connections tightly to prevent signal loss.
Boot up the Human Machine Interface (HMI) screens. Load the specific software setups for your automated operations. These digital controls synchronize the mechanical movements perfectly. Calibrate the tension sensors and temperature probes through the software interface. You are now ready to begin the actual machinery commissioning process.
Phase 6: The Ultimate Textile Machine Commissioning Checklist
You just calibrated your sensors and booted the HMI. Now, you face the final hurdle. A complete commissioning process takes anywhere from 3 to 10 days. It depends entirely on your setup complexity. Mastering how to install textile machinery: site prep to commissioning requires strict patience here.
Pre-Power Mechanical Checks
Stop before you flip the main breaker. You must perform rigorous pre-power mechanical checks. Walk around the entire equipment line. Verify every single structural bolt connection. You secured these during phase four.
You must check all lubrication points manually. Dry gears will strip immediately upon startup. Always verify your internal belt tensions. Ensure operators locked all physical safety guards firmly.
As we covered earlier, double-check your phase rotation now. Running a heavy stenter or calendering machine in reverse causes catastrophic mechanical failure.
Dry Run Testing
Next, you must initiate the dry run. You will test mechanical movements first. Do not load any raw materials yet. Start the motors at their lowest possible speed.
Listen closely for any unusual mechanical noises. Watch carefully for unexpected frame vibrations. Document all baseline vibration levels right now. You will use this exact data for future predictive maintenance.
We test our intelligent textile machinery extensively at SutexMach. However, on-site dry runs confirm local assembly success. Increase the motor speed very gradually. Ensure the take-up and let-off motions synchronize perfectly through the PLC.
Wet Run and Load Testing
Move to the wet run next. You will now run actual fabric or yarn. Thread the internal material path carefully.
Load testing shows actual machine performance. Calibrate your fabric tension sensors precisely. Adjust the processing speed and temperature controls on your HMI.
Our drying and air-softening machines require strict temperature management. Monitor the fabric output quality closely. Ensure the fabric does not skew or stretch improperly.
Formação de operadores
Skilled operators must run your new equipment. Your factory team needs comprehensive training. Do not rush this critical step.
You must teach them intelligent interface navigation. Demonstrate safe fault clearing procedures clearly. Review the mandatory maintenance schedules in detail.
Most importantly, practice emergency stop procedures. Every operator must know exactly how to halt the machine instantly.
Final Sign-Off
The final step is official handover. You must complete all required commissioning documentation. Register your new equipment warranties immediately.
Review your complete textile machine commissioning checklist one last time. Both the installation team and the factory manager must sign the final paperwork.
| Commissioning Stage | Critical Action Item | Primary Goal |
|---|---|---|
| Pre-Power Checks | Verify lubrication and phase rotation | Prevent immediate mechanical damage |
| Dry Run | Document baseline vibration levels | Ensure safe, synchronized motor movement |
| Wet Run | Calibrate tension and temperature | Guarantee high-quality fabric output |
| Formação de operadores | Practice emergency stops | Ensure workplace safety and efficiency |
Why Global Fabric Mills Trust SutexMach for Seamless Installations
You signed the final commissioning paperwork. Your operators know the emergency stop procedures. The complex process of how to install textile machinery: site prep to commissioning is complete. Achieving this seamless result requires a highly reliable partner.
Global fabric mills trust SutexMach entirely. We eliminate costly factory installation guesswork. We founded our manufacturing company in 1985. We bring over 30 years of experience to your floor. We manufacture intelligent textile machinery for global markets.
We are affiliated to Jiangsu SoHo Honry Import & Export Co., Ltd. This strong backing provides comprehensive logistical support. It guarantees secure technical assistance anywhere. You receive heavy equipment safely and exactly on schedule.
Tailored Guidance for Specialized Equipment
Every factory setup demands unique mechanical solutions. We offer tailored guidance for our specialized equipment. Our core intelligent product lineup includes:
- Precision sueding and calendering machines
- Continuous drying and stenter frames
- Advanced dyeing and warp knitting units
- High-capacity dewatering and air-softening machines
As we covered earlier, long frames require extreme precision. We guide your riggers through specific modular assembly steps. We ensure your equipment hits critical leveling tolerances perfectly.
| Support Phase | SutexMach Service Profile | Direct Mill Benefit |
|---|---|---|
| Global Logistics | Coordinated heavy equipment shipping | Prevents transit damage and facility delays |
| Mechanical Assembly | Tailored modular installation guidance | Ensures strict structural leveling and alignment |
| System Integration | Expert HMI and PLC calibration | Guarantees perfectly synchronized motor movement |
| After-Sales Care | Rapid remote troubleshooting access | Minimizes unexpected daily production downtime |
Dedicated After-Sales Service
A successful wet run does not end our partnership. We provide dedicated after-sales service globally. We ensure your long-term operational success.
Intelligent PLC units sometimes throw unexpected error codes later. We offer rapid remote troubleshooting to solve digital issues. Our engineers guide your team through complex sensor calibrations. This ongoing support keeps your production line running smoothly.
Conclusão
Proper installation ensures your textile machinery runs efficiently.
Always follow strict foundation, utility, and safety guidelines.
This careful process guarantees optimal daily machine performance.
Contact SutexMach to upgrade your fabric mill today.
Take These Actionable Next Steps Right Now
- Measure your available floor space for new machines.
- Test your soil and concrete for load capacity.
- Upgrade your electrical wiring to meet modern standards.
- Call SutexMach to discuss your specific machinery needs.
Frequently Asked Questions About How to Install Textile Machinery: Site Prep to Commissioning
How long does it take to commission textile machinery?
Commissioning usually takes 3 to 10 days. The exact time depends on machine complexity. Simple machines generally finish their testing phases much faster. Large systems need more time for careful testing. SutexMach ensures smooth setup for our stenter and dyeing machines. We always run dry and wet trials. This careful process guarantees high-quality fabric output every time.
Can I use standard concrete for the machine foundation?
No, standard concrete is not recommended. You should use high-strength, non-shrink grout. New concrete floors must cure for at least 28 days. This prevents cracking under heavy loads. Industrial textile machines consistently generate very strong operational vibrations. Chemical anchors are better than mechanical ones. They stop expansion stress on your factory floor.
How do you align long textile machines accurately?
Traditional spirit levels are not enough for long machines. You should use a laser tracker or a theodolite. These tools prevent cumulative errors over long distances. Precision leveling is critical for smooth operation. Standard tolerance is often 0.05mm to 0.1mm per meter. Accurate alignment prevents needle breakage and uneven wear.
What environmental conditions do textile machines need?
Your factory must control both temperature and humidity. The best temperature range is 20°C to 25°C. This protects electronic parts and keeps fibers consistent. Relative humidity should stay between 50% and 65%. Proper humidity stops yarn breakage and reduces static electricity. Always install good climate control systems before delivery.
How can I prevent vibration issues affecting other equipment?
Strong vibrations can cause machines to move. You must use anti-vibration pads under the equipment. Proper chemical anchoring also keeps the machine safely in place. Your floor must support 500 to 1,500 kg/m². Document baseline vibration levels during the first setup. This helps you plan future predictive maintenance easily.
Proper installation ensures your textile machinery runs efficiently and safely. Careful site preparation prevents future mechanical failures. Precise leveling and environmental controls protect your valuable investment. SutexMach provides reliable equipment backed by over 30 years of global experience. Follow expert guidelines to maximize your production quality. Smooth commissioning leads to long-term manufacturing success.
- Evaluate your factory floor load capacity with a structural engineer.
- Install dedicated climate control systems for optimal temperature and humidity.
- Purchase high-strength chemical anchors for securing heavy, vibrating equipment.
- Hire certified technicians to perform laser alignment on long machine frames.