


 French
 English
 Hungarian
 Indonesian
 Bulgarian
 Turkish
 Polish
 Russian
 Spanish
 Portuguese
 Korean


Une machine à étirage défectueuse met votre processus de finition textile à l'arrêt. Ce temps d'arrêt coûte cher à votre filature. Vous rencontrez des difficultés dues à des pannes soudaines de séchage ou de thermofixation ? Nous pouvons vous aider à diagnostiquer et à résoudre rapidement ces problèmes. Dans cet article, vous découvrirez huit défauts courants. Nous abordons les blocages mécaniques ainsi que les solutions pour améliorer la qualité du tissu.
Understanding Your Equipment: Why Is My Stenter Machine Not Working?
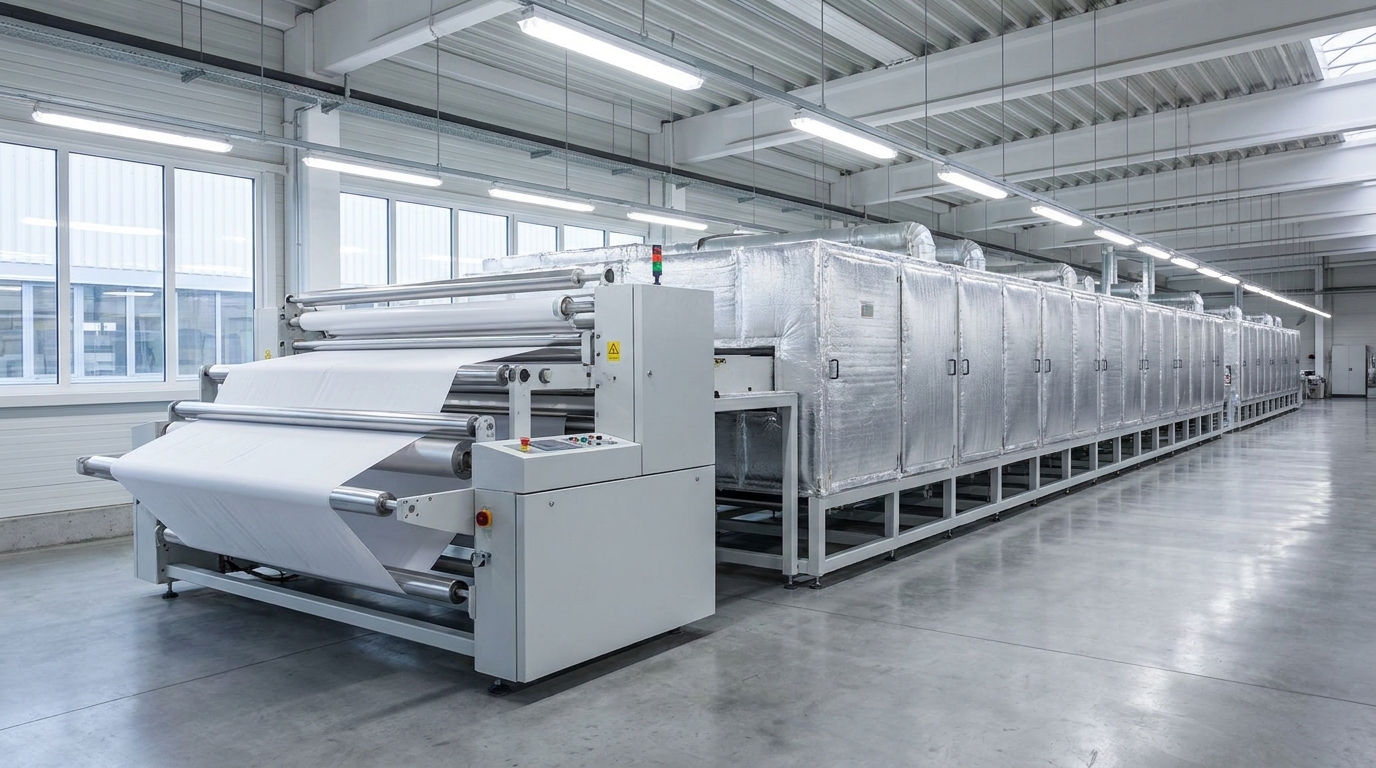
You already know a broken machine drains your budget. But before diving into specific fixes, we must look at why these breakdowns happen.
Modern stenter machines are highly complex. They combine intense heat, heavy mechanical parts, and sensitive electronics. At SutexMach, we have spent over 30 years building intelligent textile machinery for global fabric mills. We know exactly how these systems interact under extreme conditions.
The Three Core Systems
Your equipment relies on three main systems working perfectly together:
- Thermal Systems: Gas burners often generate up to 300,000 kcal/hr per chamber. Drying typically requires temperatures between 100°C and 150°C. Heat setting polyester pushes temperatures up to 210°C.
- Mechanical Systems: Heavy chains pull fabric at speeds between 10 and 100 meters per minute. Pin plates, clips, and overfeed rollers handle constant physical stress.
- Electronic Systems: Automated weft straighteners and edge sensors monitor fabric alignment constantly.
The Impact of Continuous Operation
Global fabric mills rarely turn their machines off. High speeds and extreme heat degrade components over time. Chain lubrication oils eventually break down under high heat. Exhaust filters easily clog during heavy production runs. This constant operational stress inevitably leads to natural wear and tear.
Complete Shutdowns vs. Operational Faults
When a stenter machine stops working, you face two different scenarios. A complete mechanical shutdown is very obvious. The entire production line simply stops moving. However, operational quality faults are much more sneaky. The machine keeps running, but it ruins your fabric.
For example, you might struggle to identify Le séchage inégal d’une machine à étirer provoque due to hidden clogged nozzles. You might also notice variation de la largeur du tissu cadre d’étirage issues when chain tension drops. Both scenarios mean your equipment is failing.
| Fault Type | Characteristics | Common Examples |
|---|---|---|
| Complete Shutdown | Machine halts completely. Zero production. Easy to spot immediately. | Motor failure, broken drive shaft, power loss, severe mechanical jam. |
| Operational Fault (Quality Loss) | Machine runs but damages fabric. Harder to diagnose quickly. | Uneven drying, fabric yellowing, width variations, oil spots. |
Fault 1: Stenter Machine Uneven Drying Causes and Solutions
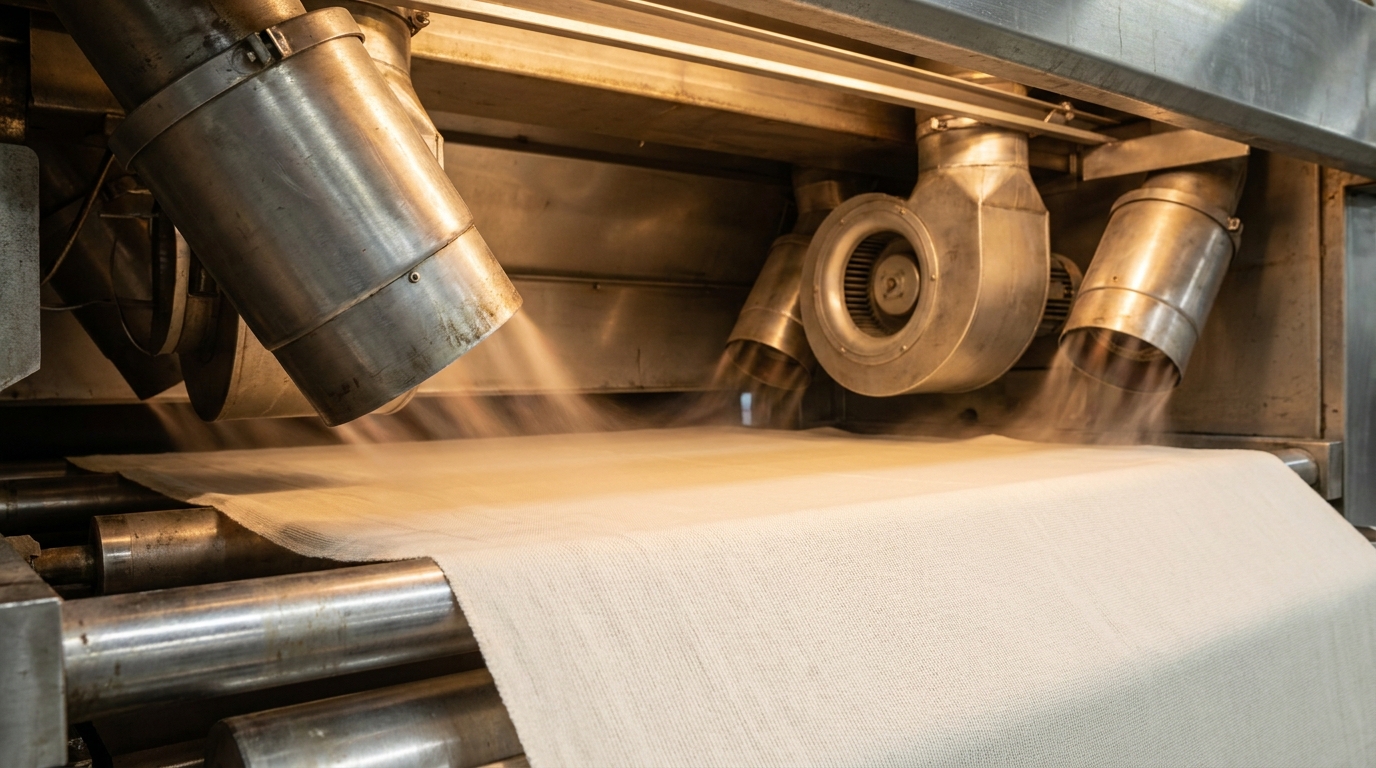
As we covered earlier, operational faults often hide behind normal machine operation. You might see the equipment running perfectly. However, the fabric exiting the chamber tells a different story. At SutexMach, our 30 years of manufacturing intelligent textile machinery shows uneven drying ruins fabric quality fast. Let us look at why your stenter machine is not working correctly regarding moisture control.
Identifying the Drying Problem
You can spot this fault by checking the fabric web. Moisture inconsistencies will appear across the material as it exits the machine. The center might feel bone dry. Meanwhile, the edges remain damp. You might also notice severe “shading” issues during later dyeing stages.
Different fabrics have strict moisture targets. Cotton fabrics need a 6-8% exit moisture level. Synthetics require a much lower 0-2% moisture content. When your equipment fails to hit these targets evenly, you have a serious drying fault.
Hidden Causes of Moisture Variations
Several hidden issues cause these frustrating moisture variations. They usually stem from the thermal and mechanical systems interacting poorly.
- Blocked Hot Air Nozzles: Lint and finishing chemicals build up inside the nozzle boxes. This buildup blocks the airflow directly hitting your fabric.
- Imbalanced Circulation Blowers: Exhaust fans typically move 1,000 to 3,000 m³/hr per chamber. If blower speeds become imbalanced, hot air distribution fails across the machine width.
- Faulty Temperature Sensors: Built-in PT100 sensors naturally drift over time. They might tell your control panel the chamber reached 150°C. The actual physical temperature could be much lower.
Step-by-Step Fixes for Even Drying
You need a systematic approach to resolve these uneven drying issues. Follow these actionable steps to restore proper moisture control.
- Clean the Air Nozzles: Do not wait for a complete shutdown. Clean your air filters every single shift. Schedule a deep clean of the nozzle boxes weekly. This simple routine prevents lint buildup and stops shading defects.
- Calibrate Circulation Fans: Check the inverter drives controlling your blowers. Ensure they operate at matching speeds across the entire machine width. Adjust the exhaust dampers to balance the airflow perfectly.
- Verify Temperature Distribution: Never trust the control panel blindly. Grab an independent handheld pyrometer. Measure the actual temperature inside each chamber. Replace or recalibrate the PT100 sensor immediately if the readings do not match.
| Drying Symptom | Probable Cause | Immediate Action Required |
|---|---|---|
| Damp fabric edges | Imbalanced circulation blowers | Check fan inverter speeds and dampers. |
| Center shading on fabric | Blocked hot air nozzles | Clean nozzle boxes and air filters. |
| Overall high moisture content | Faulty PT100 temperature sensor | Verify chamber heat using a handheld pyrometer. |
Fault 2: Fabric Width Variation Stenter Frame Issues
You just fixed your moisture control issues. The fabric now exits the drying chambers perfectly dry. However, another silent operational fault might be ruining your batch. Failing to hold the correct dimensions is a massive problem. Let us examine fabric width variation stenter frame issues.
Identifying the Width Problem
You set the control panel to a specific width. The fabric enters the machine perfectly. Yet, it exits much narrower at the back end. This inability to achieve or hold the target width disrupts your entire production line. Garment manufacturers demand strict tolerances. The standard industrial requirement dictates ±1mm accuracy across the entire machine width. When your equipment misses this mark, clients will reject the fabric.
Many operators ask why the fabric shrinks after leaving the chamber. This happens due to rapid cooling and elastic recovery. If the mechanical grip fails, the fabric pulls inward.
Hidden Causes of Width Variation
Why does this happen? The causes usually hide deep inside your mechanical systems. At SutexMach, we build intelligent textile machinery. Our engineers see three common culprits behind this specific fault.
- Misaligned Adjustment Screws: Width adjustment screws push and pull the chain tracks. If they lose alignment, the track bows inward slightly. This bowing causes uneven stretching.
- Worn-Out Spindles: Constant tension wears down mechanical spindles over time. Worn spindles cannot lock the chain track firmly in place. The track drifts during high-speed operation.
- Incorrect Overfeed Settings: Overfeed controls how much extra fabric feeds into the machine. Standard ranges fall between -10% and +40%. Setting this incorrectly forces the fabric to stretch unnaturally.
Step-by-Step Fixes for Width Control
You must calibrate your equipment to solve these inconsistencies. Follow these actionable steps to restore perfect width control.
- Calibrate the Mechanism: Check the width adjustment screws across every single chamber. Ensure they move smoothly. Align them perfectly using a laser guide.
- Inspect and Replace Spindles: Do not ignore heavy mechanical wear. Inspect the width spindles monthly. Replace any stripped or loose parts immediately. Ignoring worn spindles quickly leads to severe problèmes d’entretien de la chaîne de la stenter.
- Adjust Overfeed Ratios: Follow a simple rule for your overfeed settings. If the fabric feels too heavy (GSM too high), decrease your overfeed. If the fabric feels too light or fails shrinkage tests, increase it. A +5% to +10% overfeed ratio usually works best for controlling residual shrinkage in knits.
| Width Symptom | Probable Cause | Immediate Action Required |
|---|---|---|
| Fabric gradually narrows through chambers | Misaligned adjustment screws | Realign screws and check track straightness. |
| Width fluctuates randomly during run | Worn-out width spindles | Inspect mechanical spindles and replace worn parts. |
| Fabric fails shrinkage test / wrong GSM | Incorrect overfeed settings | Adjust overfeed ratio based on fabric weight. |
Fault 3: Stenter Pin Marks on Fabric and Clip Slippage
You just fixed your width variation issues. The fabric now holds its dimensions perfectly. But holding that perfect width requires a solid physical grip on the fabric edges. If this mechanical grip fails, your stenter machine is not working correctly. Let us look at physical damage and slippage at the entry zone.
Identifying the Holding Problem
You can spot this fault right at the machine exit. Sometimes, you will see physical tears along the fabric selvedge. Other times, the fabric simply falls off the pins midway through the chamber. Operators call this “dropping.”
Heavy woven fabrics held by clips might slip out entirely. If you see deep, ugly marques de broches de stenter sur le tissu, your holding mechanism is actively destroying your product. Clients reject these damaged selvedges instantly. This wastes expensive material and hurts your bottom line.
Hidden Causes of Selvedge Damage
Why does this grip fail? At SutexMach, our 30 years of experience building intelligent textile machinery points to specific mechanical failures. These issues usually happen right where the fabric meets the chain.
- Dull or Bent Pins: Pin plates degrade over time. Constant heat and high-speed operation bend them. Dull pins punch large holes instead of piercing the yarn cleanly.
- Incorrect Brush Pressure: The pinning brush pushes your fabric onto the pins. Light pressure leaves the fabric sitting too high. It easily falls off. Heavy pressure drives the fabric too deep, causing severe marks.
- Malfunctioning Clips: Heavy wovens often use clips instead of pins. Weak springs or lint buildup prevent these clips from biting down hard enough. The fabric slips out under high tension.
- Improper Entry Tension: High tension at the entry zone pulls the fabric aggressively. This excessive force rips the material right off the pins before it even enters the heating chamber.
Step-by-Step Fixes for Pin and Clip Issues
You must secure the fabric edges without causing damage. Follow these actionable steps to restore a perfect mechanical grip.
- Replace Damaged Pin Plates: Inspect your pin plates regularly. Swap out dull or bent plates immediately. Pins work best for knits and high-shrinkage fabrics. However, they must remain razor-sharp to prevent yarn damage.
- Adjust Pinning Brushes: Align the pinning wheel perfectly with the chain track. Adjust the brush pressure carefully. It should push the fabric exactly to the base of the pin, but no further. Replace worn brushes that have lost their stiffness.
- Calibrate Entry Tension: Check your overfeed and entry rollers. Ensure the fabric feeds smoothly. Eliminate excessive drag before the material hits the pinning zone. Proper alignment of the selvedge uncurlers also helps feed the fabric flat.
- Clean and Test Clips: If you use clips, clean them weekly. Lint buildup ruins their grip. Test the spring tension manually. Ensure they provide a firm hold without slipping during production.
| Symptom | Probable Cause | Immediate Action Required |
|---|---|---|
| Fabric falling off pins (dropping) | Light brush pressure or improper uncurler alignment | Increase brush pressure and realign edge sensors. |
| Large holes or torn selvedges | Dull, bent pins or excessive brush pressure | Replace pin plates and reduce brush downward force. |
| Heavy woven fabric slipping out | Weak clip springs or lint blockage | Clean clip jaws and replace weak tension springs. |
Fault 4: Stenter Chain Track Maintenance Problems
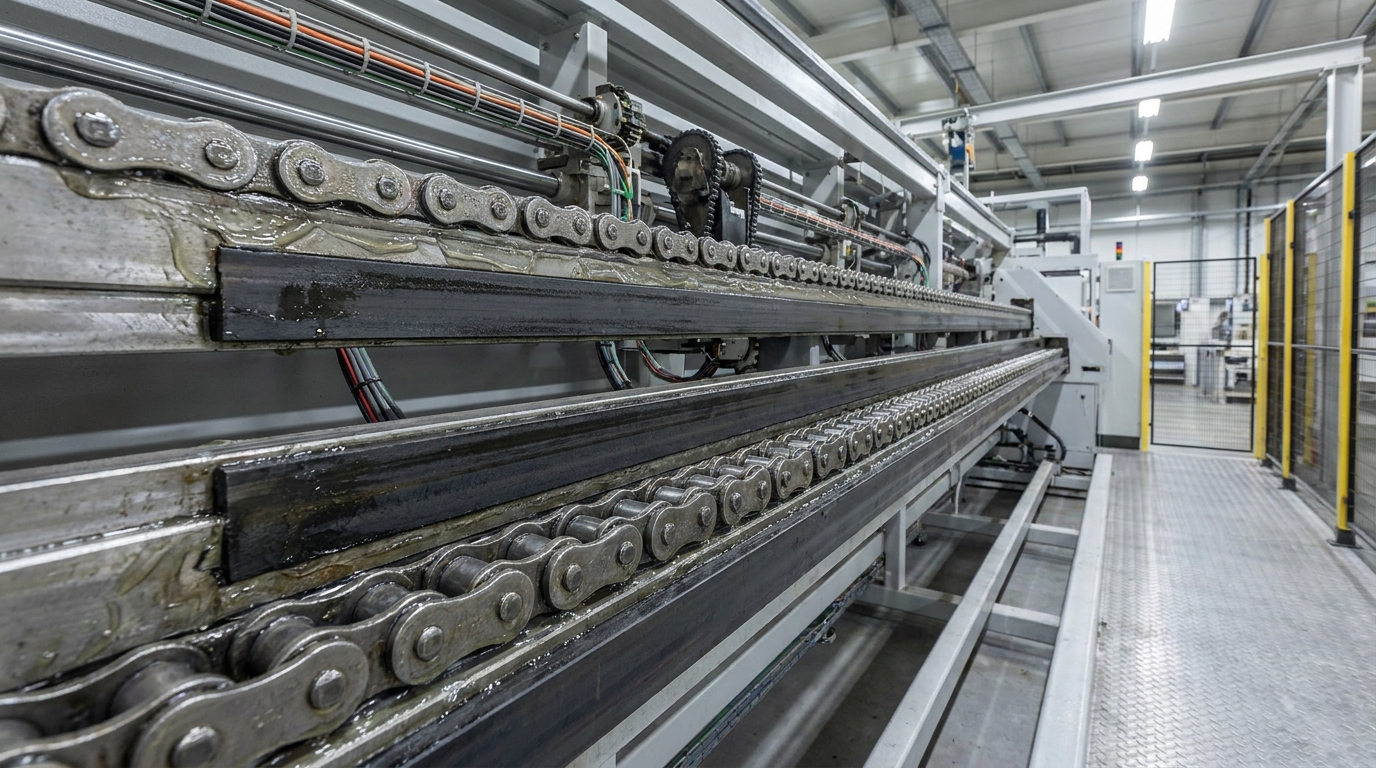
You secured the selvedge grip perfectly in the last step. Your fabric now stays firmly on the pins. However, those pins rely on heavy mechanical chains. They pull the material through the heating chambers. If these chains struggle to move, your entire production line suffers.
Identifying the Chain Problem
How do you spot chain track issues? Listen closely to your equipment during operation. You might hear unusual grinding noises coming from the side panels. Watch the fabric movement as it enters the chambers. Jerky chain movement causes the fabric to stutter. In the worst cases, the chain jams completely. This forces a sudden machine halt. It quickly ruins any fabric trapped inside the hot chambers.
Hidden Causes of Track Failures
At SutexMach, our 30 years of manufacturing intelligent textile machinery reveals a clear pattern. Extreme heat and continuous operation destroy mechanical components over time.
- Lubrication Failure: Chain oils must withstand continuous temperatures up to 250°C. Low-quality oils break down fast. They stop lubricating and start baking onto the metal.
- Carbon and Lint Buildup: Broken-down oil turns into hard carbon deposits. Fabric lint mixes into this mess. It creates a thick sludge blocking the lubrication channels entirely.
- Worn Graphite Strips: Heavy chains slide along graphite wear strips. Constant friction grinds these strips down. Once they wear out completely, metal grinds directly against metal.
Step-by-Step Fixes for Smooth Operation
You must maintain these tracks aggressively. Follow these steps to prevent sudden mechanical jams and keep your stenter machine working smoothly.
- Upgrade Your Lubrication: Only use high-temperature synthetic chain oils. They must resist carbonization at extreme temperatures. Implement a strict, automated lubrication schedule for consistent oil delivery.
- Clean Carbon Deposits: Do not let sludge accumulate. Safely scrape carbon deposits from the chain tracks during scheduled downtime. Flush the blocked lubrication lines completely to restore flow.
- Run a Dummy Fabric: Over-lubricating causes oil spots on your product. Always run a “dummy” fabric or leader cloth when starting the machine. This catches any oil drips before you process expensive production batches.
| Chain Symptom | Probable Cause | Immediate Action Required |
|---|---|---|
| Unusual grinding noises | Worn graphite wear strips | Inspect and replace the wear strips immediately. |
| Jerky chain movement or jams | Carbon and lint sludge buildup | Clean the tracks and flush lubrication lines. |
| Oil spots on fabric edges | Over-lubrication or leaking lines | Run a dummy fabric and adjust oil flow settings. |
Fault 5: Exhaust System and Ventilation Blockages
You just cleared the carbon sludge from your chain tracks. The mechanical parts now pull your fabric smoothly. But moving the material is only half the battle. You must also remove the moisture and chemical fumes baking off the fabric. If your factory floor suddenly fills with smoke, your stenter machine is not working correctly. Let us explore exhaust system and ventilation blockages.
Identifying the Ventilation Problem
How do you know the exhaust system is failing? The signs usually appear very clearly. First, you might notice poor moisture removal. The fabric exits damp, even though your burner temperatures remain perfect.
Second, excessive smoke might billow out of the chamber doors. It quickly fills your factory floor. Finally, look up at the ceiling inside the machine. You might see dirty condensation dripping back down onto your processed fabric. This dark chemical drip ruins entire batches instantly.
Hidden Causes of Exhaust Failures
What chokes your ventilation system? At SutexMach, our 30 years of building intelligent textile machinery shows that exhaust failures happen gradually. They usually stem from a mix of lint and chemical vapors.
- Clogged Exhaust Filters: Airborne fibers and dust constantly circulate. They quickly plug the fine mesh screens protecting your exhaust system.
- Heavy Ducting Buildup: Evaporated finishing oils cool down inside the exhaust ducts. They form a thick, sticky residue. This buildup drastically reduces the pipe diameter.
- Failing Fan Motors: Exhaust fans typically move 1,000 to 3,000 m³/hr of air per chamber. Continuous exposure to extreme heat and moisture degrades these motors over time.
Step-by-Step Fixes for Clear Airflow
You must clear these blockages to restore proper moisture extraction. Follow these actionable steps to fix your ventilation issues.
- Establish a Routine Filter Cleaning: Never skip filter maintenance. Clean the exhaust filters every single shift. A clean filter allows the fans to pull moisture out effortlessly.
- Inspect and Scrape Ductwork: Schedule a deep cleaning for your main exhaust pipes. Scrape away the sticky oil residue monthly. This restores proper airflow and prevents severe fire hazards.
- Check Fan Motor Performance: Test the exhaust fan motors regularly. Measure their electrical draw. Replace any struggling motors before they fail completely during a production run.
| Exhaust Symptom | Probable Cause | Immediate Action Required |
|---|---|---|
| Smoke filling the factory floor | Clogged exhaust filters | Remove and clean the mesh screens immediately. |
| Condensation dripping on fabric | Heavy oil buildup in ducting | Scrape and clean the internal exhaust pipes. |
| Poor moisture removal | Failing exhaust fan motors | Test motor amperage and replace weak units. |
Fault 6: Heating System Failures (Thermal Oil or Gas)
You just cleared your exhaust ducts. The fans now pull moisture out perfectly. However, perfect airflow means nothing if the air itself is cold. If your stenter machine is not working correctly, the heating system might be failing. Let us look at thermal oil and gas burner issues.
Identifying the Heating Problem
How do you know the heat source is failing? Look at your control panel. You set the machine for heat setting polyester. This process requires temperatures between 180°C and 210°C. But the chamber struggles to pass 150°C. Sometimes, the temperature fluctuates wildly during the run.
This failure ruins thermofixation. It leaves synthetic fabrics prone to severe shrinkage later. You might also see uneven curing on finished fabrics. When the machine cannot maintain steady heat, your entire production quality drops.
Hidden Causes of Temperature Drops
At SutexMach, we have built intelligent textile machinery for over 30 years. Our engineers see specific patterns in these thermal failures. They usually depend on your primary heat source.
- Blocked Proportional Valves: Thermal oil systems use proportional valves to control flow. Old oil creates thick sludge. This sludge blocks the valves. They cannot open fully to let hot oil enter the radiator.
- Faulty Gas Burners: Gas burners often generate up to 300,000 kcal/hr per chamber. Poor gas quality creates heavy soot. This soot clogs the burner nozzles and chokes the flame.
- Defective Heat Exchangers: Dust and lint coat the heat exchanger fins. This buildup acts like a thick blanket. It stops heat from transferring into the circulating air.
Step-by-Step Fixes for Steady Heat
You must restore maximum thermal efficiency safely. Follow these actionable steps to fix your heating system.
- Troubleshoot Valve Operations: Inspect the thermal oil proportional valves manually. Ensure they open and close smoothly. Flush the oil lines immediately if you find thick sludge.
- Clean Burner Nozzles: Shut off the gas supply safely. Remove the burner nozzles and scrub away the soot. A clean nozzle produces a strong, efficient blue flame.
- Clean Heat Exchangers: Blow out the radiator fins using compressed air. Remove the insulating lint layer completely. This allows heat to transfer freely into the chamber.
- Verify Calibration: Grab an independent handheld pyrometer. Measure the actual temperature inside the chamber. Compare this reading against your built-in PT100 sensors. Recalibrate the system if the numbers differ.
| Heating Symptom | Probable Cause | Immediate Action Required |
|---|---|---|
| Chamber cannot reach 180°C | Blocked thermal oil valves | Inspect and flush proportional valves. |
| Weak or yellow burner flame | Clogged gas burner nozzles | Shut off gas and clean burner heads. |
| Burner runs but air stays cold | Lint covering heat exchangers | Blow out radiator fins using compressed air. |
Fault 7: Fabric Bowing and Skewing (Weft Distortion)
You just fixed your thermal issues. Your gas burners and thermal oil valves now deliver steady heat. But perfect temperature means nothing if the fabric shape gets distorted. When your stenter machine is not working correctly mechanically, the yarns twist under tension. Let us look at fabric bowing and skewing.
Identifying the Distortion Problem
How do you spot weft distortion? Look closely at the horizontal yarns crossing the fabric web. They should run perfectly straight from edge to edge. Instead, you might see them curving deeply like a bow. Sometimes they slant diagonally across the entire width. Operators call this specific defect skewing.
This distortion destroys dimensional stability. It locks the wrong shape into the material during heat setting. Garment factories will reject this material instantly. Clothes cut from skewed fabric twist terribly after their first wash.
Hidden Causes of Bowing and Skewing
Why do these yarns lose their straight alignment? At SutexMach, our 30 years of building intelligent textile machinery reveals two main culprits. They usually happen before the fabric even enters the heating chambers.
- Weft Straightener Malfunctions: Most machines use an automatic optical weft straightener at the entry zone. Optical sensors read the yarn angles constantly. If lint blinds these sensors, the correction rollers cannot fix the distortion.
- Uneven Chain Speeds: The left and right stenter chains must run at the exact same speed. If one drive motor lags, it pulls one side of the fabric slower. This mechanical drag forces the weft yarns to skew diagonally.
- Uneven Roller Tension: The padding mangle and overfeed rollers must apply even pressure. Uneven pneumatic pressure across these rollers pushes the center of the fabric faster than the edges. This creates severe bowing.
Step-by-Step Fixes for Straight Yarns
You must align these yarns before the extreme heat locks them in place. Follow these actionable steps to fix bowing and skewing immediately.
- Clean and Recalibrate Sensors: Lint easily blinds sensitive optical lenses. Wipe down the weft straightener sensors carefully every single shift. Recalibrate the software system to ensure it reads the yarn angles accurately.
- Synchronize Drive Motors: Check the inverter drives controlling both main chains. They must output the exact same electrical frequency. Synchronize the drive motors so both chains pull the fabric perfectly evenly.
- Balance Roller Pressure: Test the pneumatic cylinders on your entry rollers. Ensure they apply equal pressure on both the left and right sides. Replace any leaking air valves immediately.
| Distortion Symptom | Probable Cause | Immediate Action Required |
|---|---|---|
| Yarns slant diagonally (Skewing) | Uneven left and right chain speeds | Synchronize main drive motors and check inverters. |
| Yarns curve in the center (Bowing) | Uneven padding roller pressure | Balance pneumatic pressure across all entry rollers. |
| Straightener fails to correct fabric | Blinded optical sensors | Clean sensor lenses and recalibrate the system. |
Fault 8: Electrical and Control Panel Malfunctions
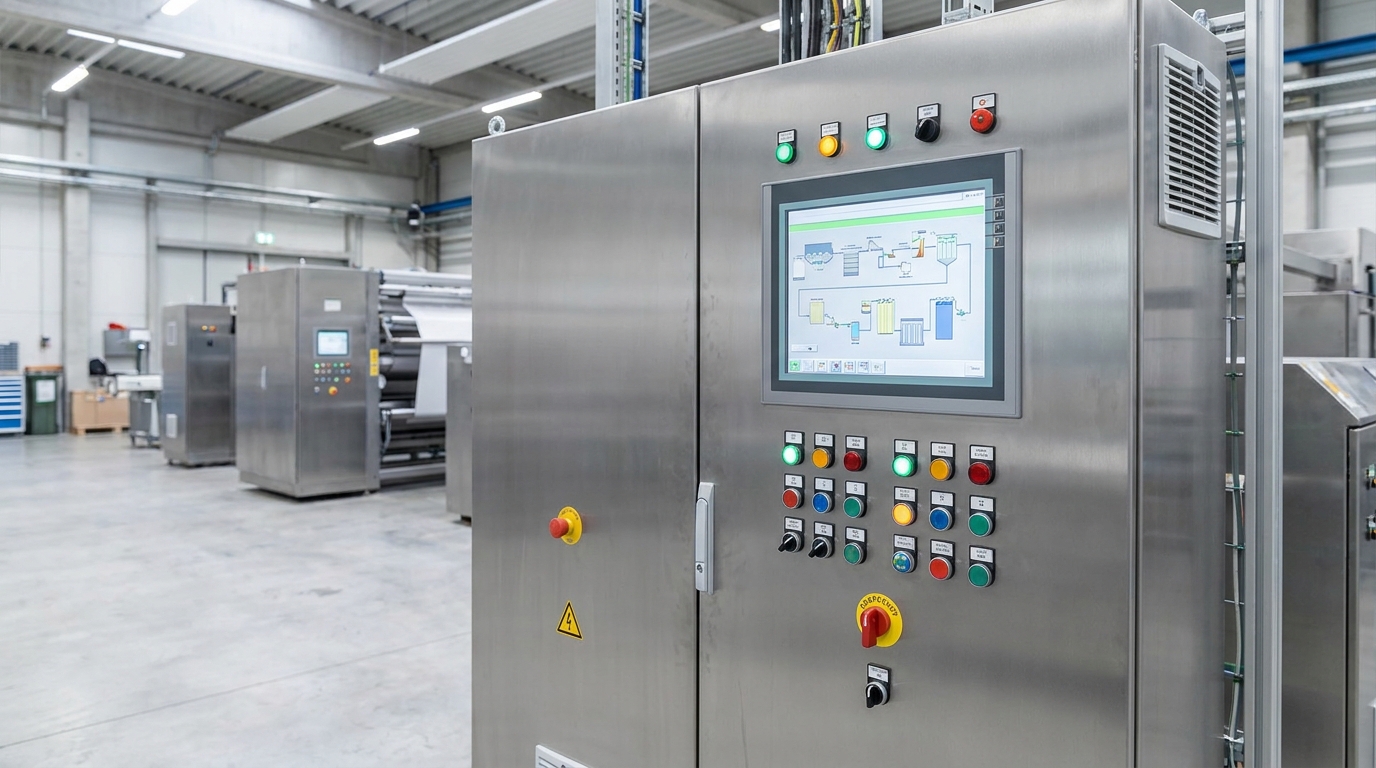
You just aligned your yarns perfectly. The weft straightener now works flawlessly. But what happens if the main screen goes completely dark? Sometimes your stenter machine is not working simply because it loses power. Let us examine electrical and control panel malfunctions.
Identifying the Electrical Problem
How do you spot an electrical failure? This fault is usually very obvious. The equipment becomes completely unresponsive. It might stop suddenly during a high-speed production run. You look at the Human-Machine Interface (HMI) screen. It flashes critical error codes. Sometimes, the entire control panel just goes black. When this happens, your entire finishing line halts instantly.
Hidden Causes of Power Failures
Why do these systems fail? At SutexMach, we have manufactured intelligent textile machinery since 1985. Our electrical engineers see extreme factory conditions destroy sensitive components over time. Heat and vibration are the biggest enemies here.
- Tripped Overload Relays: Drive motors pull heavy loads. If a chain jams mechanically, the motor pulls too much current. The overload relay trips safely to prevent a fire.
- Blown Fuses: Factory power grids often experience sudden voltage spikes. These power surges blow safety fuses instantly.
- Faulty Inverters: Inverters control your exhaust fans and main drives. Continuous exposure to high factory temperatures fries their internal circuit boards.
- PLC Software Glitches: The Programmable Logic Controller (PLC) acts as the machine brain. Communication glitches here cause the HMI screen to freeze or display false errors.
Step-by-Step Fixes for Control Panels
You must restore power safely to get production moving again. Follow these actionable steps to isolate and fix electrical malfunctions.
- Reset Breakers and Relays: Open the main electrical cabinet safely. Check for tripped motor overload relays. Reset them manually. If a relay trips repeatedly, look for a mechanical jam causing the motor to strain.
- Inspect Wiring for Heat Damage: Extreme chamber heat eventually melts wire insulation. Inspect the wiring connections near the heating zones. Replace any burnt or brittle wires immediately.
- Consult Electrical Schematics: Do not guess when replacing components. Use the original electrical schematic. Trace the fault codes back to the specific failing inverter or sensor.
- Reboot the PLC System: Sometimes the software simply hangs. Power down the machine completely. Wait a few minutes, then reboot the PLC to clear basic communication glitches.
| Electrical Symptom | Probable Cause | Immediate Action Required |
|---|---|---|
| Machine stops suddenly mid-run | Tripped motor overload relay | Reset relay and check for mechanical chain jams. |
| HMI screen flashes error codes | Inverter fault or PLC glitch | Reboot system and trace code in the manual. |
| Burning smell near the cabinet | Heat-damaged wire insulation | Shut off main power and replace melted wiring. |
Preventative Maintenance: Keeping Your Stenter Machine Working Properly
You just restored power to your control panel. The main drive motors are running, and production is moving again. But reacting to sudden electrical failures or mechanical jams is incredibly stressful. It wastes valuable time. If you constantly find yourself dealing with a stenter machine not working, you need a new strategy. You must stop waiting for these 8 faults and fixes to dictate your schedule. Proactive care is the only way to keep your finishing line profitable.
The Power of Preventative Maintenance Checklists
At SutexMach, we have manufactured intelligent textile machinery since 1985. Over the past 30 years, we have seen how a simple routine changes everything. Equipment degrades naturally under extreme heat and constant tension. A strict preventative maintenance checklist catches this wear and tear early. You need daily, weekly, and monthly schedules. This structured approach stops minor issues from turning into complete machine shutdowns.
| Maintenance Frequency | Key Action Items | Target Fault Prevented |
|---|---|---|
| Daily Check | Clean exhaust filters and wipe optical weft straightener sensors. | Ventilation blockages and fabric skewing. |
| Weekly Check | Clean hot air nozzle boxes and inspect pin plates for bent tips. | Uneven drying and selvedge dropping. |
| Monthly Check | Verify PT100 sensors and flush thermal oil proportional valves. | Heating system failures and width variations. |
Training Operators to Spot Early Warning Signs
Your machine operators are your first line of defense. They spend every shift listening to and watching the equipment. You must train them to spot the early warning signs of the faults we discussed. They should not wait for a massive fabric tear to report a problem.
Teach them to listen for unusual grinding noises in the chain tracks. Show them how to spot slight dampness on the fabric edges exiting the chamber. If they notice minor weft bowing, they should know to check the optical sensors immediately. When operators understand how the mechanical and thermal systems interact, they stop bad batches instantly.
Extending Lifespan and Ensuring Quality
Consistent fabric finishing quality requires a perfectly balanced machine. Proactive care keeps your gas burners burning clean. It keeps your mechanical chains pulling smoothly. This prevents the slow degradation that ruins your fabric width and moisture targets.
Regular maintenance also extends the overall lifespan of your equipment. Replacing worn graphite strips prevents catastrophic metal-on-metal damage. Flushing lubrication lines stops hard carbon sludge from forming. When you maintain your equipment aggressively, you protect your heavy machinery. You guarantee every single yard of fabric meets your clients’ strict standards.
Upgrade to Intelligent Textile Machinery with SutexMach
You just built a solid preventative maintenance schedule. Your operators now know how to spot early warning signs. But maintaining older, failing equipment takes constant effort. If you still find your stenter machine not working despite your best efforts, you might need a permanent solution.
Upgrading your finishing line eliminates these daily headaches. SutexMach opened its doors in 1985. We are proudly affiliated to Jiangsu SoHo Honry Import & Export Co., Ltd. We operate as a professional manufacturer of intelligent textile machinery. Over the past 30 years, we have helped global fabric mills modernize their production lines.
Engineering Faults Out of the Design
You no longer need to worry about these 8 faults and fixes when your equipment runs flawlessly. Our advanced stenter machines are engineered specifically to minimize common operational failures. We build them to handle extreme heat and constant tension effortlessly.
Smart sensors monitor exhaust airflow automatically. Automated lubrication systems prevent chain track sludge from forming. High-precision weft straighteners stop bowing and skewing before they start. You spend less time fixing breakdowns and more time producing perfect fabric.
| Historical Fault | SutexMach Intelligent Solution | Direct Benefit to You |
|---|---|---|
| Heating system failures | Precision gas burners and automated thermal valves. | Consistent heat setting across every chamber. |
| Mechanical chain jams | Automated high-temperature lubrication delivery. | Zero manual greasing and smooth operation. |
| Electrical malfunctions | Advanced PLC controls and robust inverters. | Uninterrupted runs without sudden shutdowns. |
A Complete Line of Finishing Equipment
We do much more than just stenter machines. Global fabric mills trust our entire range of finishing equipment. We design and manufacture a complete lineup to meet your specific factory needs.
We specialize in manufacturing the following intelligent textile machinery:
- Sueding and Calendering Machines: Designed for achieving premium surface finishes.
- Drying and Dyeing Machines: Engineered for perfect color and moisture control.
- Machines à tricoter en chaîne : Built for high-speed, reliable fabric production.
- Dewatering and Air-Softening Machines: Perfected for superior fabric hand-feel.
Modernizing your factory floor stops the constant cycle of repairs. You gain reliable, high-speed production immediately. Your operators focus on quality instead of struggling with broken parts.
Conclusion
Fixing these eight common stenter machine faults saves your mill time and money. Proactive care always ensures smooth fabric production. For highly reliable equipment, choose SutexMach. We build intelligent textile machinery to minimize daily downtime. Contact our expert team today for technical support.
- Create a daily cleaning schedule for air nozzles.
- Inspect your chain tracks for carbon buildup weekly.
- Call SutexMach to upgrade your aging textile equipment.
Frequently Asked Questions About Stenter Machines
Why does the fabric fall off the pins during operation?
Fabric dropping off pins is a common production issue. It usually happens due to misaligned selvedge uncurlers. Blunt pins or incorrect brush pressure can also cause this. To fix it, check the uncurler alignment first. Always replace any dull pins immediately. Adjust the brush pressure to ensure a firm grip.
How can I prevent oil spots on light-colored fabrics?
Oil spots often come from leaking chain lubricants. Over-greased bearings can also drip onto the cloth. First, manage your lubrication schedule carefully. Clean the drip trays under the chain tracks regularly. Always use a dummy fabric when starting the machine. This helps catch any stray oil before production begins. High-quality chain oils must withstand 250°C without breaking down.
Why is the fabric width narrower than the machine setting?
A narrow fabric width usually results from elastic recovery. Cooling issues at the machine exit also play a role. Sometimes, improper overfeed settings cause this unwanted shrinkage. Check the width adjustment spindles for mechanical accuracy. Ensure the fabric cools properly before rolling it up. If the fabric is too heavy, decrease the overfeed ratio. Adjusting these settings helps maintain the exact width.
What causes fabric yellowing in the middle of a run?
Yellowing, or scorching, happens when the fabric gets too hot. This often occurs if the machine stalls unexpectedly. An uneven burner flame can also cause localized scorching. Check the gas burners and ensure they operate correctly. Verify the temperature matches the specific fiber type. Polyester needs 180°C to 210°C, while cotton requires less heat. Keep the dwell time between 20 and 40 seconds.
How do I reduce energy costs while using a stenter?
High energy costs often stem from inefficient drying processes. To save energy, optimize your exhaust air systems. Install heat recovery systems to reuse wasted warmth. Calibrate your gas burners to burn fuel efficiently. Clean the air filters during every single shift. Blocked filters force the circulation fans to work harder. Proper maintenance reduces gas and electricity consumption significantly.
Where can I find reliable stenter machines and expert support?
Finding a trustworthy manufacturer is vital for textile mills. SutexMach has been building intelligent textile machinery since 1985. With over 30 years of experience, we specialize in advanced stenters. Our equipment helps global fabric mills achieve consistent quality. We offer expert guidance to solve common heat-setting faults. Upgrading to our modern machines reduces downtime and improves efficiency.
Fixing stenter machine faults requires prompt action and regular maintenance. You must monitor temperature settings, airflow, and chain lubrication closely. Identifying the root cause of fabric distortion saves time and materials. Proper adjustments ensure high-quality textile finishes and improve energy efficiency. Reliable equipment from experienced manufacturers makes this process much smoother.
- Schedule weekly inspections for nozzle boxes and selvedge uncurlers.
- Train your operators to calibrate gas burners every month.
- Use a handheld pyrometer to verify actual chamber temperatures.
- Contact SutexMach today to upgrade your aging textile equipment.